### Summary
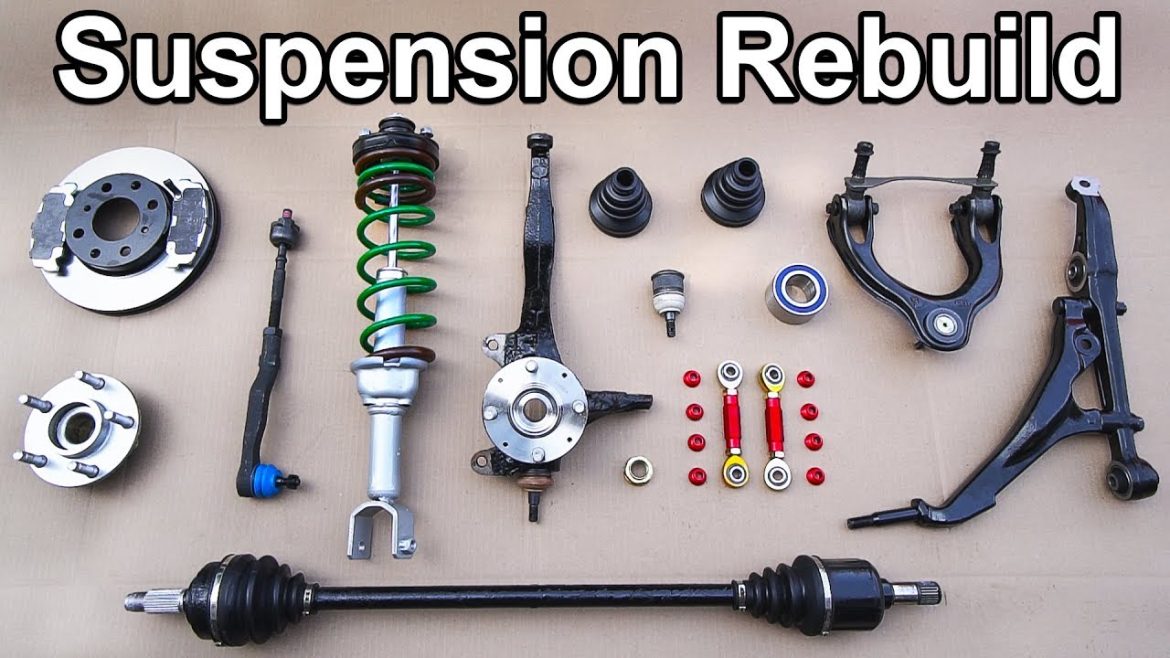
In this detailed and practical video tutorial, ChrisFix demonstrates the complete process of removing an old, rusty front suspension system from a car or truck and installing a brand-new, fully upgraded front suspension. The tutorial covers every essential step and component involved, starting from dismantling the worn-out parts to pressing in new ball joints and bearings, installing control arms, struts, tie rods, hubs, brake components, and finally reassembling and torqueing everything to factory specifications. ChrisFix emphasizes using common hand tools, with only a few specialized tools like bearing and ball joint presses, which can be rented at local auto parts stores. The video includes useful tips such as cooling the ball joints for easier installation, applying threadlocker on bolts to prevent loosening, properly installing cotter pins and clips for safety, lubricating bushings and joints to prevent squeaks, and ensuring correct alignment marks on tie rods for near-perfect wheel alignment before a professional alignment shop visit. He also explains how to handle difficult bolts, the importance of careful torqueing on suspension bushings to avoid premature wear, and how to safely support the vehicle during installation. The tutorial concludes with a brake system installation, wheel mounting, final torqueing of axle nuts and lug nuts, and a demonstration of the improved driving feel after the suspension upgrade. ChrisFix also hints at an upcoming turbo kit installation project, promising more performance enhancements. Overall, this video is a comprehensive guide for DIY enthusiasts looking to confidently replace their vehicle’s front suspension system with professional results, even without a lift or advanced shop equipment.
### Highlights
– 🔧 Complete front suspension replacement from old rusty parts to brand-new components.
– ❄️ Cooling ball joints and bearings in ice water for easier installation.
– 🔩 Using threadlocker on all bolts to prevent loosening and corrosion.
– 🛠️ Detailed guidance on pressing in ball joints and wheel bearings using rented tools.
– 🧰 Tips on safely installing cotter pins, clips, and torqueing suspension bushings.
– 🚗 Emphasis on pre-alignment setup using tie rod measurements before professional alignment.
– 🛑 Step-by-step brake system reinstallation and final torqueing for safety and performance.
### Key Insights
– 🔧 **DIY Suspension Overhaul Feasibility:** ChrisFix proves that a full front suspension replacement can be done at home using basic hand tools and a few rented specialty tools. This lowers the barrier for DIY mechanics, showing that expensive lifts and shop equipment are not mandatory for complex suspension work, making vehicle restoration and upgrade projects more accessible.
– ❄️ **Thermal Expansion for Precision Fit:** Cooling ball joints and bearings causes metal contraction, allowing easier installation into warmer suspension parts. This technique reduces the risk of damaging components during press-fitting and ensures a secure, tight fit without excessive force, which could otherwise deform or damage parts.
– 🔩 **Threadlocker Usage for Reliability:** Applying threadlocker on all suspension bolts and nuts is critical to prevent vibration-induced loosening and corrosion. This not only improves mechanical reliability and safety but also reduces future maintenance needs, ensuring bolts remain properly torqued throughout the vehicle’s use.
– 🧰 **Safe Installation of Safety Clips and Cotter Pins:** Proper installation of castle nuts, cotter pins, and retaining clips is emphasized as a vital safety step. These components prevent critical suspension and steering parts from loosening during vehicle operation, highlighting the importance of attention to detail in suspension rebuilds to avoid catastrophic failures.
– 🛠️ **Proper Torqueing and Bushing Load Management:** The video highlights the importance of not overtightening bolts that pass through rubber bushings before the suspension is loaded under vehicle weight. Tightening these bushings only after the vehicle is lowered prevents premature wear and cracking of the bushings, prolonging suspension life and maintaining ride quality.
– 🚗 **Alignment Preparations for Safety and Performance:** ChrisFix shows how to measure and mark the inner and outer tie rods to maintain approximate alignment settings before taking the vehicle for a professional wheel alignment. This ensures the vehicle is safe and drivable immediately after suspension installation, minimizing tire wear and steering issues.
– 🛑 **Comprehensive Brake System Reinstallation:** The tutorial includes reassembling the brake rotors, calipers, and pads with attention to cleaning rotors to remove factory grease, applying anti-seize on caliper bolts, and torqueing to specifications. This ensures the braking system functions correctly after suspension replacement, which is crucial for vehicle safety.
This video serves as an invaluable resource for anyone looking to perform a complete front suspension replacement with professional quality at home. It covers everything from preparation and disassembly to reassembly, torqueing, and testing, while offering practical tips and safety reminders that are often overlooked. The thoroughness and clarity of instruction make it suitable for both beginners and experienced DIY mechanics aiming to improve their automotive repair skills and vehicle performance.